In the vast landscape of internet security, Norton stands tall as a guardian against digital threats. However, there are instances when you may need to disable Norton Internet Security temporarily, perhaps for troubleshooting or installing a new software. Navigating this process seamlessly is crucial, and in this comprehensive guide, we’ll walk you through the steps, ensuring you understand the ‘hows’ and ‘whys’ of disabling Norton.
Understanding Norton Internet Security
Before we delve into the disabling process, let’s take a moment to understand Norton Internet Security’s role. This robust software shields your computer from various online threats, including viruses, malware, and phishing attacks. While its protective features are indispensable, certain situations may necessitate turning it off temporarily.
Step 1: Locate the Norton Icon
Begin by locating the Norton icon in your system tray, usually found in the bottom-right corner of your screen. It resembles a yellow, green, blue, or red circle, depending on your version of Norton.
Step 2: Open Norton Security
Right-click on the Norton icon, and from the context menu, select “Open Norton Security.” This action will launch the Norton Security window, displaying various options to manage your security settings.
Step 3: Access Settings
Navigate to the “Settings” option within the Norton Security window. This is where you gain control over the various features and configurations of Norton Internet Security.
Step 4: Disable Auto-Protect
Once in the Settings menu, locate the “Antivirus” or “Auto-Protect” tab. Here, you’ll find an option to toggle Auto-Protect. Click on it to turn off this feature temporarily. This step is essential to ensure that Norton doesn’t interfere with your current task.
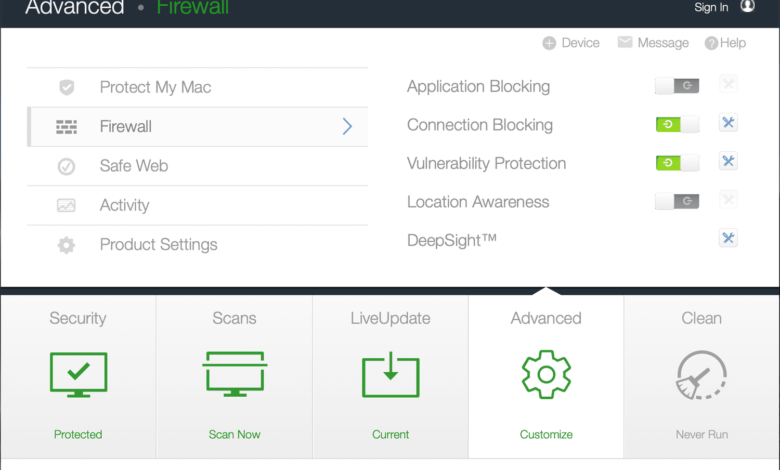
Step 5: Turn Off Firewall
In the same Settings menu, find the “Firewall” option. Similar to Auto-Protect, toggle the switch to turn off the firewall temporarily. Disabling the firewall is a crucial step, especially when installing certain applications that may be hindered by stringent security measures.
Step 6: Choose a Duration
Norton allows you to disable its features for a specific duration. Select the timeframe that aligns with your needs, whether it’s for 15 minutes, 1 hour, or until you manually enable it again.
Step 7: Apply Changes
After adjusting the settings according to your requirements, don’t forget to click the “Apply” or “OK” button. This finalizes the changes you’ve made, ensuring that Norton Internet Security is temporarily disabled.
Step 8: Verify the Status
To confirm that Norton is indeed disabled, check the main Norton Security window. It should clearly indicate that features like Auto-Protect and Firewall are turned off for the specified duration.
Step 9: Enable Norton Security
Once you’ve completed your task or resolved the issue that required Norton’s deactivation, it’s crucial to re-enable the security features. Repeat the steps above, toggling the switches back to their original positions.
Conclusion: Striking a Balance
In conclusion, mastering the art of disabling Norton Internet Security is about striking a balance between protection and flexibility. While Norton is your shield against the ever-evolving landscape of online threats, there are scenarios where a temporary pause is necessary. By following the outlined steps, you empower yourself to navigate this delicate balance, ensuring a seamless and secure digital experience.
By embracing these steps, you not only disable Norton Internet Security effectively but also gain a deeper understanding of its functionalities. Remember, in the realm of cybersecurity, knowledge is power, and you’ve just added another layer to your digital defense strategy.